Introduction to Digital Forensics Incident Response (DFIR)
Published by harrisonjonesit.co.uk on
Introduction to digital forensics Incident response (DFIR)
Digital Forensics is the process of analysing a computer to discover malicious activity once it has been discovered This could be as simple as a dodgy piece of software downloaded by an employee from a phishing link, or something much more sinister like gathering evidence on criminal activity to be used in court.
I take part in incident response on a daily basis in my job, however this usually means blocking phishing emails and removing unapproved software, rather than conducting a full forensic analysis, like one which would be used in court.
The Project
For this project, I will take a Linux Mint workstation, perform a malicious task to replicate a real attack (in this case, I will simply upload confidential files to an external Onedrive). I will then take an image of the device and conduct an analysis to see if i can determine which files were exfiltrated and by who.
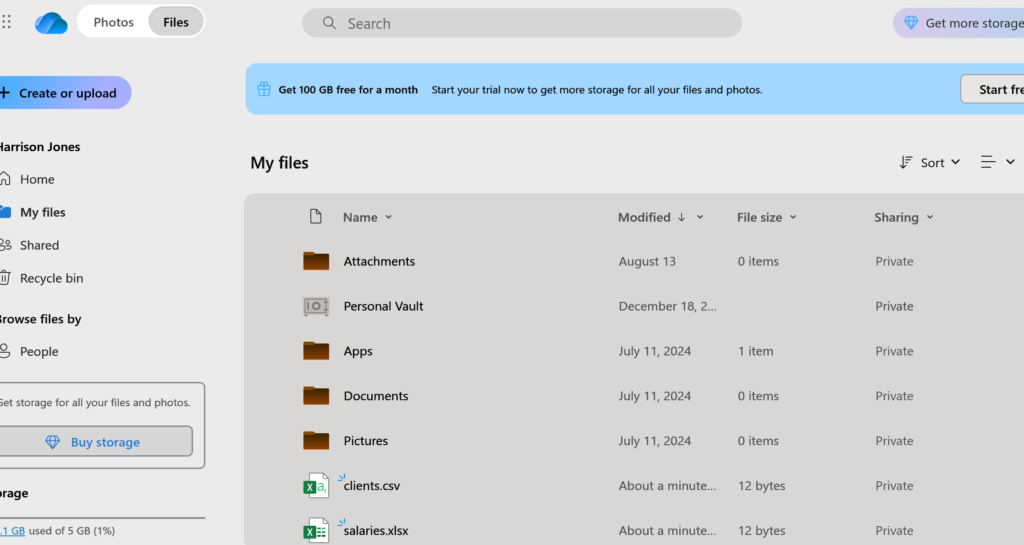
The first step is to create these ‘confidential files’ on the target machine and upload them to Onedrive, like a criminal would if they were stealing or uploading explicit pictures.
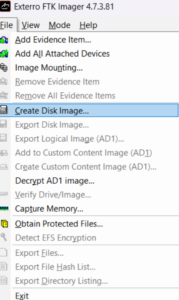
Now the malicious activity has taken place. We will pretend this activity would be flagged by a corporate EDR/SOC solution and isolated. We will now take a read only image of the computer before verifying the hash associated with the image before beginning investigation. We need to be able to verify that the image has not been edited as otherwise this evidence would not hold up in court. I will be using Exterro which is a common opensource image used by many anlysis companies and looks like this
Now the image has been created, we can obtain a hash value by running the following command in a terminal on the computer where the image has been saved.
sha256sum image.dd
Once obtained, we can make a note at the time of analysis and compare the two, if they are the same hash value then we can confirm the image has not been altered, even by one bit.
We must now ‘mount’ the image.
Without going into too much detail, we mount the image so we can read the contents like a disk and set it to read only to ensure integrity, some images might not work if they are encrypted or if the file system has been damaged, in this case we could use a different method, like ‘autopsy’. the following command will mount the image from the point where the file system begins and store it in a blank folder which has been created, the ro cmdlet ensures it is read only.
We are now finally at the point where we can start analysing the machine (This is why i never went into Law). We must try and answer these questions.
How did they get in? (initial access)
What did they do first?
How did they stay in? (persistence)
What did they take or damage?
Did they try to hide?
There are lots of checks\tricks we can do now to determine if there was privilege escalation/ persistence etc we can look for things like, SUDO history, new admin accounts and registry key entries, to name a view. these can all be seen using simple tools like event viewer and task scheduler.
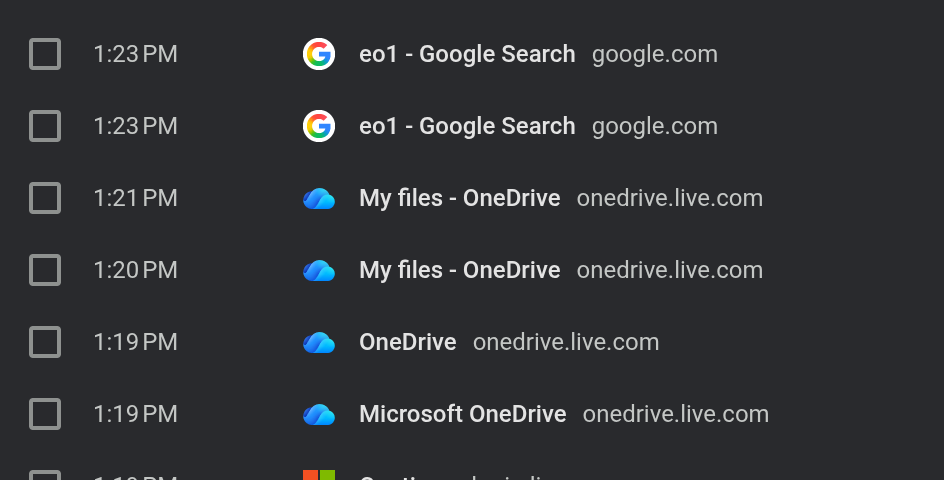
As we can see, Onedrive was visited during the time we believe the attack took place, which raises suspicion. further to this, if the files were edited or ZIP’d etc we can add this to our report. “Artifacts indicate that sensitive files were staged, archived, and uploaded via the OneDrive client associated with the user account, consistent with data exfiltration.”
Conclusion
further checks would include checking if any other files had been modified during this time and if the computer made contact with any other machines within the estate. there are many sources online that detail key areas to check where a digital footprint can be found.
We will finally write a report detailing the reason for the investigation, the steps taken and the evidence gathered, along with the supporting evidence to ensure integrity and that the correct procedures were followed.
In this mini project I learned:
- How to conduct a basic digital forensics investigation
- Create a disk image and record the hash to ensure integrity of the investigation
- Basic checks and tricks to gather evidence of file exfiltration, malicious logins, malicious software installation.
- Write a report detailing actions, findings and lessons learned.
0 Comments